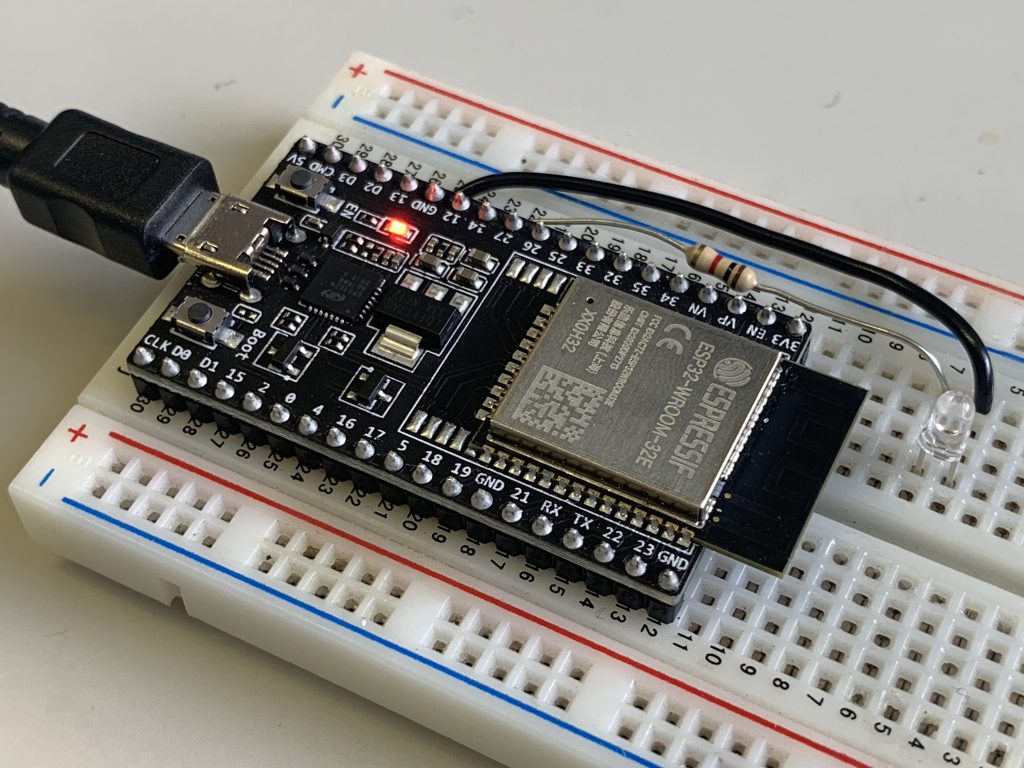
「nRF52840を使ったLowPowerデバイスの開発 その1」の続きです。nRF52840でアドバタイズしたデータを受信してwi-fiでサーバーに送信します。「ESP8266で体温計(ウェアラブルIoT体温計)」でやっていたと同じ事ですが身体に装着する装置を小型にし、電流が必要なwi-fiへの接続を外付けの装置にしています。
ESP32はBLEとwi-fiを両方使えるので今回の用途にはぴったりです。デベロッパーキットをブレッドボードに挿してLEDを付けた簡単電子工作です。LEDは送信確認で光らせているので無しでも出来ます。
nRF52840の体温計を身体に装着し、家のwi-fiが繋がる場所にこのESP32を置きます。BLEの届く範囲で連続して体温を記録することが出来ます。数メートルの範囲内で届いているようです。装置を2Fに置いて1Fでも受信できていました。BLEのスペックとしてはもっと距離が出ても良さそうですが、身体にアンテナが近いのでちょっと難しいようです。
開発にはArduino IDEを使います。
Arduinoスケッチ
/*
  2021.05.31 BLE+wifiデータ送信テスト
  ESP32 devkit
  BLEを受信してデータを受け取った場合にwi-fiに接続してデータをサーバに送信する。
  測定間隔はBroadcaster側で決まる
  broadCaster はnRF52
*/

#include <Arduino.h>
#include <BLEDevice.h>
#include <WiFi.h>
#include <WiFiMulti.h>
#include <HTTPClient.h>

WiFiMulti wifiMulti;

/* 基本属性定義  */
#define SPI_SPEED   115200          // SPI通信速度

/* スキャン制御用 */
#define DEVICE_NAME "nRF52"  // 対象デバイス名
const int scanning_time = 3;        // スキャン時間(秒)
BLEScan* pBLEScan;                  // Scanオブジェクトへのポインター

/* 受信データ構造体 */
struct tmpData {
  float   temperature;            // 温度
};

/* LEDピン */
const int ledPin = 12;              // LEDの接続ピン

void setup() {
  Serial.begin(SPI_SPEED);
  pinMode(ledPin, OUTPUT);          // GPIO設定:LED
  digitalWrite(ledPin, LOW);

  BLEDevice::init("");                        // BLEデバイスを作成する
  Serial.println("Client application start...");
  pBLEScan = BLEDevice::getScan();            // Scanオブジェクトを取得して、
  pBLEScan->setActiveScan(false);             // パッシブスキャンに設定する

  //wifi setup
  wifiMulti.addAP("wi-fiのSSID-1", "wi-fiのパスワード-1");
  wifiMulti.addAP("wi-fiのSSID-2", "wi-fiのパスワード-2");
  wifiMulti.addAP("wi-fiのSSID-3", "wi-fiのパスワード-3");

  WiFi.disconnect(true);
  WiFi.mode(WIFI_STA);
}

void loop() {
  struct tmpData td;

  // 所定時間だけスキャンして、見つかったデバイス数を取得する
  BLEScanResults foundDevices = pBLEScan->start(scanning_time);
  int count = foundDevices.getCount();

  for (int i = 0; i < count; i++) {     // 受信したアドバタイズデータを調べて
    BLEAdvertisedDevice dev = foundDevices.getDevice(i);

    std::string mfData = dev.getManufacturerData();

    //受信したデータがnRF52からなのかチェックする。その1。データ長をチェック
    if (mfData.length() == 5) {
      std::string data = dev.getManufacturerData();

      // 受信データを調べるnRF52から送信されたデータなのか確認する
      if (data[0] == 0xf3 && data[1] == 0 && data[2] == 1) {
        //温度を求めて送信へ
        td.temperature = (float)(data[4] << 8 | data[3]) / 100.00;
        displayData(&td);

        //受け取った値が体温らしい温度かどうかチェックする。範囲内なら送信
        if (td.temperature > 10.00 && td.temperature < 50.00) {
          digitalWrite(ledPin, HIGH);
          setndDataToServer(&td);//データを送信する
          digitalWrite(ledPin, LOW);
        }
      }
    }
  }
  delay(1000);
}


/* 受信データを表示する */
void displayData(struct tmpData* td) {
  Serial.print("  Temperature: ");        Serial.println(td->temperature);
}

/* wi-fiに接続してデータをサーバに送信 */
void setndDataToServer(struct tmpData* td) {
  Serial.println("setndDataToServer");
  WiFi.disconnect();

  if ((wifiMulti.run() == WL_CONNECTED)) {

    HTTPClient http;

    //体温をStringとして変数に入れる
    String tempString = String(td->temperature);

    Serial.print("tempString: ");   Serial.println(tempString);

    //送信するテキスト
    String urlString = "http://データ受信用のPHPのURL/tempData.php?temp=" + tempString;
    http.begin(urlString); //HTTP

    //Serial.print("[HTTP] GET...\n");
    // start connection and send HTTP header
    int httpCode = http.GET();

    // httpCode will be negative on error
    if (httpCode > 0) {
      // HTTP header has been send and Server response header has been handled
      //Serial.printf("[HTTP] GET... code: %d\n", httpCode);

      // file found at server
      if (httpCode == HTTP_CODE_OK) {
        String payload = http.getString();
        //Serial.println(payload);
      }
    } else {
      Serial.printf("[HTTP] GET... failed, error: %s\n", http.errorToString(httpCode).c_str());
    }

    http.end();
  } else {
    Serial.println("wi-fi connection fail");
  }
}
wifiMultiを使って複数のwi-fiを登録できます。強度の強いwi-fiに自動的に接続してくれます。自宅と職場とか複数のSSIDを登録して持ち運んで使うとかの用途が考えられます。
BLEでアドバタイズされたデータを受信してデータ長が合致するもので、中身のデータを見てnRF52から送信されたものならサーバーにデータをwi-fiで送信します。本当はUUIDやデバイスネームで識別したいのですが、デバイスネームを取り出せなかったのでデータ長とデータの中身で識別する方法にしてます。
送信されたデータを受信するPHPは以下の通りです。適当なサーバに置いてください。上記のサンプルではhttps:のサーバには繋がらないのでhttp:のサーバーの方が簡単です。
<?php

date_default_timezone_set('Asia/Tokyo');//タイムゾーンの設定

//文字コードの設定
mb_internal_encoding("UTF-8");

$mv = $_GET["temp"];


$fhandle = fopen("./log.csv", "a+");//読み込み/書き出し用でオープンします。 ファイルポインタをファイルの終端

//現在時刻の取得
fwrite($fhandle,date("Y/m/d G:i"));
fwrite($fhandle,",");
fwrite($fhandle,$mv);
fwrite($fhandle, "\n");


//レスポンス
header("Content-type: text/html");
echo "data=";
echo $mv;
echo "C\n";
受信したデータをlog.csvに日付と時刻を追加して追記していくだけです。
データをwebブラウザでグラフ表示するには「ESP8266+CO2モニタ」に書いてあるhtmlとphpが使えますので、そちらを参照してください。
